
3-Ingredient No-Knead Italian Whole Wheat Bread Recipe
Emma Fontanella’s 3-Ingredient No-Knead Italian Whole Wheat Bread—Pane di Lariano
About My Italian No-Knead Whole Wheat Bread
For me, no-knead breads and Dutch oven breads, really are the easiest of easy bread recipes. This recipe combines both!
It produces a delicious, rustic whole wheat loaf with a crispy crunchy crust and a delicious flavorful airy interior. With this method, you can make fresh homemade bread from scratch every day.
This particular bread is a traditional Italian bread called pane di Lariano. (Lariano is a small medieval town on the outskirts of Rome). I think it’s the perfect whole wheat bread. It has all the delicious flavor of whole wheat bread, without it being overpowering. And, it has a soft, open interior which is quite unusual for whole wheat breads. (Whole wheat breads are often quite dense in structure). I think you’ll love it!

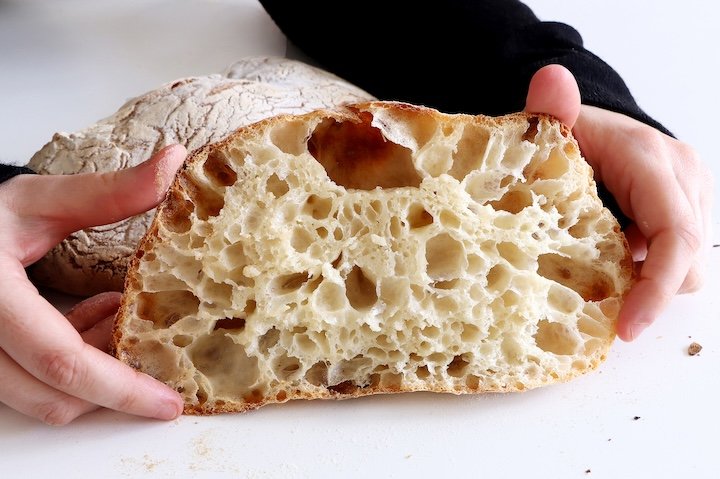
Notice the open, airy crumb structure of this whole wheat bread.
I’ve adapted the old, historic recipe which is still used in bakeries today using wood-fired ovens, to give incredible results for home bakers of any experience level, in regular home ovens.
If you’ve never made bread before, this is a great place to start! If you’re a more experienced baker, this traditional Italian bread is a great one to add to your repertoire. For more advanced bakers, I’ve included some interesting discussion about crumb structure, and how dark to take the color of the crust.
If you enjoy making bread, you’ll find other great bread recipes in my cookbook, Simple Pleasures. It includes a rustic Italian white loaf, no-oven English muffins, amazing dinner rolls, party sharing breads, and even my mom’s special focaccia made with potatoes added to the dough.
What can I use this bread for?
This is a fantastic bread for eating with soup, dipping in ragu, and for eating with cheese and cured meats such as prosciutto di parma, bresaola and salami. It’s also great for sandwiches.
What’s the secret to the open structure of this bread?
As you can see from the photos below, pane di Lariano whole wheat bread (left photo) has an open crumb structure, similar to the open structure of my white rustic Italian loaf (right). This is particular characteristic of this bread, and we achieve it by using the right kind of flour along with the right technique for making the dough.

Notice how the open structure of the pane di Lariano whole wheat bread (left) is similar to the crumb structure of my rustic white Italian loaf (right). This is achieved by using the right kind of flour along with the right technique for making the dough.
The right kind of whole wheat flour is one that’s been milled and sifted so that the largest particles are removed. These are what makes many whole wheat breads so dense in structure, because these particles are sharp and cut into the gluten network, making it hard for the bread to hold bubbles and maintain an open structure (see below for details of specific flours).
By removing these large particles, but retaining small flavorful particles of germ and bran, we can make a soft dough, with many nucleations sites for bubbles that will expand during baking. This is what the stretch and fold method gives us.
What kind of flour should I use for this bread?

If possible, Emma recommends using an Italian Type 1 flour for this bread. Caputo is a brand that’s widely available around the world, including at on-line retailers in the United States.
Traditionally, this bread is made using flour from a special wheat gown in the region. However, that’s not what’s really important for this loaf. Far more important is how the wheat is milled and processed.
If you can, I strongly recommend you use an Italian Tipo 1 flour (Type 1 flour). Italian Type 1 flours mimic the traditional stone ground milling and sifting originally used to produce whole wheat flours for this type of bread. Large particles are sifted out, leaving smaller, soft wheat germ and bran particles that are exactly what we’re looking for.
In the United States, the UK and Europe, the most widely available Italian Type 1 flour is made by Caputo. A Google search will find local suppliers. Make sure to get Type 1, and not Type 0 or Type 00!
If you don’t want to use an Italian flour, you can achieve a similar result by blending white bread flour with whole wheat flour as follows:
First, using a wire mesh strainer, sieve the whole wheat flour to remove the largest particles from it.
Then, blend this sieved whole wheat flour with white bread flour. Because all flours are different, you might need to experiment with different ratios. Start with a 50%- 50% mix. If you don’t achieve an open crumb structure, try cutting the amount of whole wheat flour to 30% sieved whole wheat, 70% white bread flour.
Please note. Different flours will absorb different amounts of water. So don’t be afraid to adjust the water amount to get the right dough consistency. It needs to be sticky. In the instructions for making the bread, I give some advice on how to do this.
What kind of yeast should I use?
You can use any kind of dried yeast you find in the supermarket. Look for products with names like “active dry yeast”, “instant dry yeast”, or “instant yeast”. These products come in sachets, boxes, jars and cans. All will work great.
Once you’ve opened a jar, can or sachet of dry yeast, it won’t last forever. It’s best to store it in the fridge, or even the freezer. That way, it will last a few months. Say around 4 months in the fridge, or 6 months in the freezer. So, if you’re not planning on using yeast that much, it’s best to buy it in the smallest quantity you can.
What if I don’t have a Dutch oven?
Traditionally, this bread is made in a cast iron pot with a lid—that is, a Dutch oven. Enamelled cast iron pots, such as the ones made by Le Creuset work particularly well.
Those can be expensive to buy (especially the famous brands), but on-line you can find inexpensive versions that cost tens of dollars. You don’t even need to spend that much though—there’s nothing wrong with using an old or second hand one. They last forever.
I use one of my mom’s old pots—it’s well over 40 years old, and still going strong (even if it is chipped, and has the odd crack)! When Dutch ovens are damaged like this, with chips in the enamel and small cracks, they are incredibly inexpensive to buy second hand because they have very limited uses in the kitchen.
You wouldn’t want to cook anything with a liquid in them in case they break. However, they’re perfect for baking bread though, and work just as well as a new one costing hundreds of dollars!

Making bread in an old pot belonging to Emma Fontanella’s mom.
You don’t have to use a Dutch oven, though. You can get great results with lots of containers. They key is that the bread is covered during the first phase of baking, to create a microenvironment with steam.
Here are some other ideas for achieving that:
A large ovenproof saucepan with lid
A stockpot or soup pot with lid
A pizza stone or baking tray with an upside-down ovenproof bowl or saucepan
A large glass Pyrex dish with lid
A large clay baker with lid
A deep roasting dish, with a tented lid made of foil
You get the idea! As long as you can cover the bread without touching it in the first phase of baking, you’re good to go! Make sure anything you use is ovenproof to the temperatures you’re setting your oven to.
Depending on what option you use, you might need to line the bottom with parchment paper to prevent the dough from sticking.
What if my dough doesn’t rise or double in size?
There are two possibilities. First, your yeast is old and has died. Second, your dough is too cold for the yeast to grow much in the time you’re eating for the dough to rise or double in size. In that case, give the dough more time, and maybe place it in a warmer spot.
Is this bread sourdough?
No, it’s not sourdough. It looks similar to many sourdough loaves you’ll see, but it’s made simply with regular dried yeast you can buy in any supermarket.
What’s the difference between artisan and rustic bread?
An artisan bread is one made using traditional methods, rather than mass-produced industrial methods. Rustic bread is a style of bread - typically baked freeform and made in a square loaf pan. So, you can have a artisanal rustic bread, if it’s made using traditional methods. And you can have an industrial, mass produced rustic loaf, like you might find in a supermarket.
What is rustic bread made of?
A good rustic bread is made with just a few simple ingredients: flour, water, yeast and salt. That compares to industrially produced bread which can have ten or twenty ingredients, all designed so that the bread can be mass-produced as quickly and as cheaply as possible.
What is the difference between rustic bread and sandwich bread?
Typically, sandwich bread is baked in a square loaf pan, and is baked to have a soft crust and close-textured crumb. Whereas, rustic bread isn’t baked in a square pan, and often has a crispy crust and open texture. However, it’s important to remember that many rustic breads can be used make incredible sandwiches!
Is rustic bread better for you?
An artisanal rustic bread, made with just a few simple ingredients and a long fermentation it’s certainly better for you than mass-produced industrial bread. Having said that, no bread is a weight loss food—it’s quite calorific. So it’s important to eat even really good bread in moderation as part of your diet.
EQUIPMENT
A large Dutch oven (or other container - see above). The minimum size is 8 inch (20cm) diameter and 3½ inches (9cm) deep. That’s a minimum capacity of 3 quarts (2.8 liters).
INGREDIENTS
1½ cups (360g) lukewarm water, that is somewhere between 80°F and 100°F (27°C to 37°C)
2 tsp (8g) kosher salt
2 tsp (7g) any dried yeast
3 cups (420g) Italian Type 1 flour, or a blend of whole wheat and white bread flour (please see the discussion of flours above for details of the right blend)
INSTRUCTIONS
Make the dough
To a large bowl, add the lukewarm water. The warm water will raise the temperature of the dough, so the fermentation process will start quickly.
Add the salt and the yeast, and give the water a good stir so that the yeast particles hydrate. This will help the dough start rising more quickly.
Don’t worry about adding the salt and yeast at the same time, nothing bad will happen (it’s a myth that the salt will kill the yeast in recipes like this).
Add the flour and mix until a wet shaggy dough forms.
Stretch and fold the dough
Now if you’ve never worked with high hydration doughs, you may start to panic, as this will look extremely wet and sticky. Don’t worry. This is how you want your dough to look.
Clean the edges of the bowl using a spatula or dough scraper, cover the dough and come back in 30 minutes.
After 30 minutes, we’re going to perform some stretches and folds.
Wet your hand so the dough doesn’t stick and take one side of the dough. Lift, stretch and fold the dough bringing it to the opposite side of your bowl. Rotate the bowl one quarter and repeat this process.

Stretching the dough

Folding the dough
Usually, we do about 4 stretches and folds per session. But because this is such high hydration dough, you’ll need to do a few more to develop strength in the dough.
The first folds will be messy. Don’t worry. Keep going. You’ll know when to stop when the dough doesn’t stretch easily anymore.
At this point cover the bowl. Come back every 30 minutes to do the next series of stretches and folds.
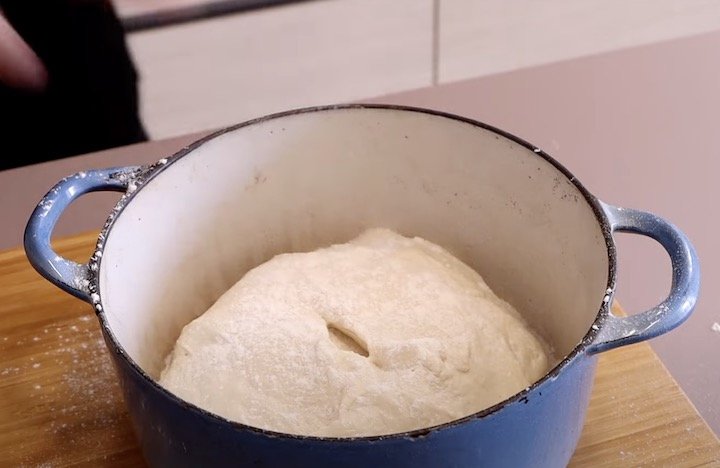
In total, repeat these rounds of stretching and folding 3 or 4 times, leaving 30 minutes in between each round. At the end if this time, the dough should have double in size.
If it hasn’t quite doubled in size, do another round of stretches and folds.
If the dough hasn’t risen much, it might be that the dough is too cold for the yeast to grow quickly. Give it up to 4 hours to see if it rises. See also the section above, “What if my dough doesn’t rise or double in size?“
At this point, the bread is ready to bake.
Pre-heat your oven and Dutch oven
Preheat your oven with your empty Dutch oven inside at 450°F (230°C). There’s no need to heat the lid. It should take around 10 minutes to come to temperature.
If you don’t have a Dutch oven, see the section above called, “What if I don’t have a Dutch oven?”
Shape the loaf, and bake the bread
Now, take the hot Dutch oven out of the oven. (Be careful to use oven gloves!). Dust the bottom with flour (see photo).

Dust the bottom of the pot with flour
Once your dutch oven has preheated, sprinkle the inside with flour. To shape the dough, use wet hands to lift the dough up by its middle, and tuck the ends underneath. This is called a “coil fold”
The idea of the coil folds is to keep the same top surface on the dough.
Perform two coil folds, and then drop the dough gently into the pot and make a slash in the bread with scissors.

Making a cut into the top of the loaf
Dust the top of the loaf with flour (see photo)
Dusting the top of the loaf with flour
Put the the lid on on the Dutch oven, and transfer to the preheated oven.
Bake with the lid on at 450°F (230°C) for 30 to 35 minutes.
Then remove the lid, drop the oven temperature to 400°F (200°C) and make for another 10 or 20 minutes or longer, or until you’ve achieved the color of crust you want.
Please don’t go by time on this. Use your eyes to judge when you’ve got a good, strong color on the crust. If it takes longer than 20 minutes, so be it!
The finished loaf, just out of the oven.
Allow the bread to cool before cutting into it
Using a wood spoon or spatula, carefully remove the bread from the Dutch oven and allow it to cool on a wire rack (or turn the bread on its side).

Removing the finished loaf from the Dutch oven
Leave it for at least 45 minutes before cutting in to it. Ideally wait until it’s completely cool before cutting.
A slice of the finished loaf.
You might also like…
4-Ingredient No Knead Ciabatta
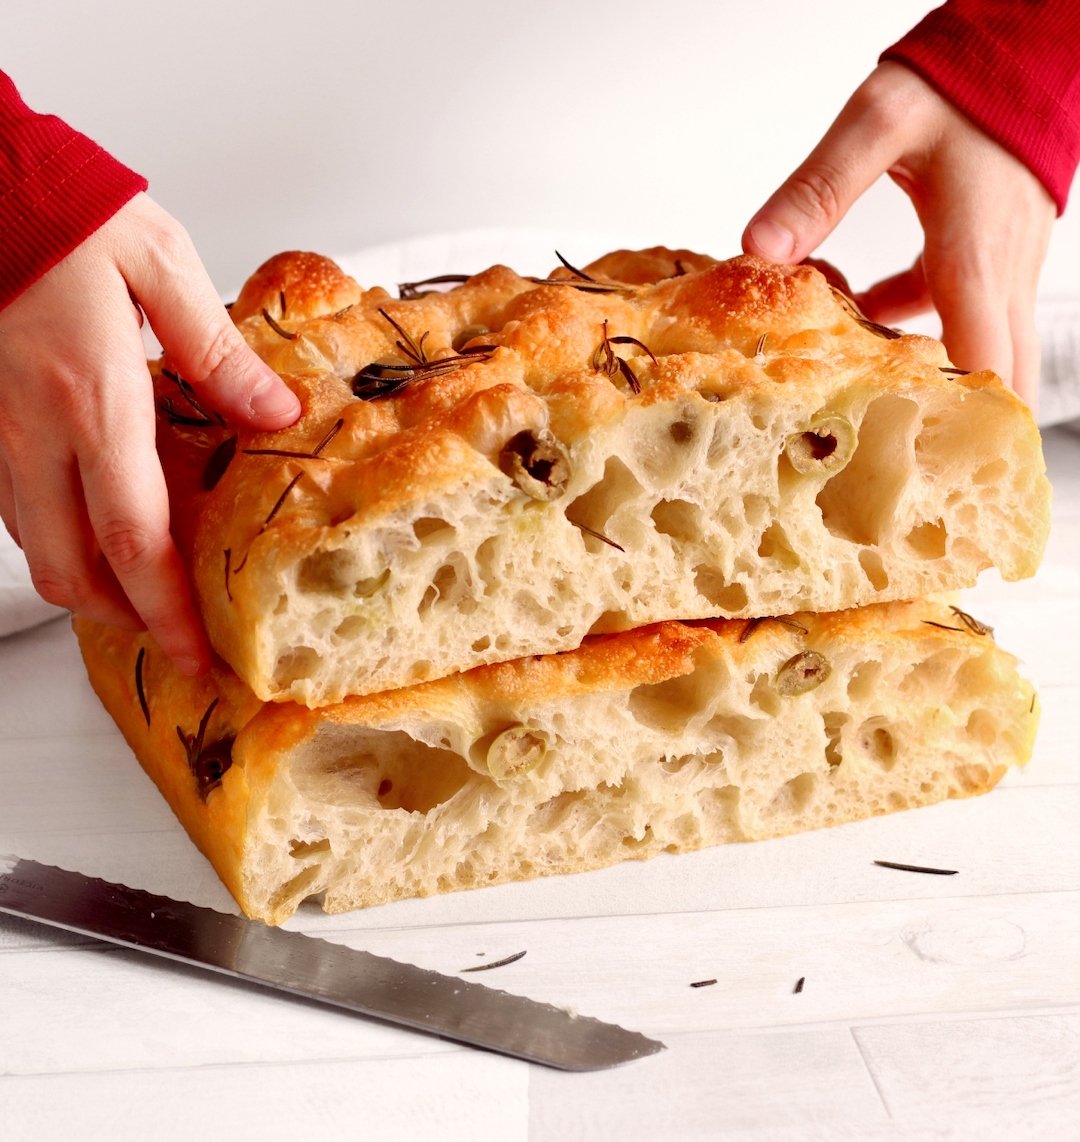
Big Bubble No-Knead Focaccia
Watch the video for more tips on the technique for making this easy rustic no-knead Italian bread.

Categories: Easy bread recipes, 3 ingredient bread

Hi! I’m Emma Fontanella. Here you’ll find trusted, tested recipes to satisfy your baking addiction and carb cravings. Learn more…
Tried one of my recipes? Please let me know on Instagram (@emmafontanella) or TikTok (@emma.fontanella)! Hashtag #emmafontanella
Search for another recipe…