
3 Ingredient No Knead Bread Without A Dutch Oven
Emma Fontanella’s Easy 3 Ingredient No-Knead Bread Without A Dutch Oven
How To Make No Knead Bread Without Using a Dutch Oven
For me, rustic, artisan breads with a crispy crunchy crust and a soft, white interior are some of the most delicious and versatile loaves, as well as being the easiest to make. This recipe is closely related to my Easy Italian No-Knead Bread Recipe, but uses a different method.
The key point about this version is that it doesn’t call for special equipment, like a Dutch oven. So, if you’re looking for how to make artisan bread without using a Dutch oven, this is the recipe for you.

Toasted, this is the perfect bread for making bruschetta.
The inspiration for this recipe really came from the fact that I know many people, like my mom, don’t have the strength to lift heavy cast iron pots around. I’ve also had many people asking what they can do if they don’t own a Dutch oven.
So, I wanted to develop a method for making no knead bread without using a Dutch oven. If either of those scenarios sounds like you, read on! Please consider this a “Part 2” to my Dutch oven bread recipe. Please do read that recipe - there are lots of great tips in there that I haven’t reproduced here.
If you like this bread recipe, there are lots more breads in my cookbook, Simple Pleasures, including no-oven English muffins, amazing dinner rolls, party sharing breads, and even my mom’s special focaccia.
About the no-knead method of making this bread
If you’re familiar with my Dutch oven bread recipe, or any of my other no-knead breads, you’ll be familiar with stretching and folding dough. The stretching and folding method we use here is different. We use what are known as “coil folds”. This is needed to give shape to the dough, which isn’t required when using a Dutch oven.

The “no Dutch oven” artisan bread, baking in the oven.
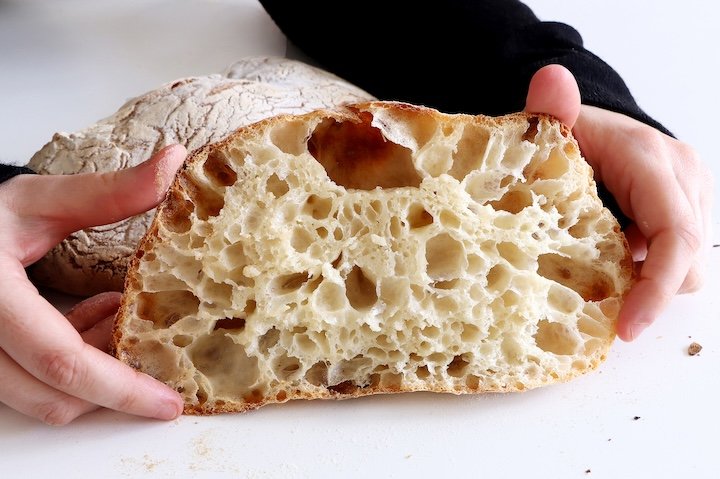
The stretch and fold method delivers a bread with a beautiful open texture.

Note how the stretch and fold method produces an artisan style bread with a beautiful open crumb structure.
Why are the final shaping steps important in making this bread?
The final shaping steps using the coil folds are required to ensure good oven spring when baking the loaf.
Adjusting the recipe to use a cold overnight fermentation
If you want to make this loaf using a cold overnight fermentation, halve the amount of yeast in the recipe. Mix the dough, as per the recipe below. Cover well and allow to sit one hour at room temperature, then place in the fridge overnight to slow down the yeast growth.
The next day, take the dough out of the fridge and transfer to a clean bowl. Allow the dough to warm up for about an hour. Then, follow the stretch and fold process as per the recipe below. The dough might take a bit longer to double in size, because it will take some time to rise to room temperature
What kind of flour should I use for this bread?

I used an Italian Type 00 flour with 11% protein made by Barilla for this recipe. All-purpose flour with this level of protein content gives great results for short fermentations like in this Italian bread recipe. Barilla flour is available in many countries, but there’s no need to use this specific flour. Read this section for advice about what flour to use.
I like to use an Italian flour, Barilla Type 00 flour, for this recipe. It gives a delicious, crispy, crunchy crust, and a beautiful soft, white crumb. This flour has 11% protein. It’s available from online retailers in many countries, including the United States. However, you absolutely do not need to use this flour. You should look for a flour with at least 11% protein content to make this bread.
In the United States and Canada, where hard wheat is typically used, all-purpose flour will do the job well. Bread flour, which has even higher protein content, will also work perfectly.
In the UK, though, where “soft wheat” is grown, all-purpose plain flour, might not have enough protein content. Likewise, plain flour in Australia tends to have lower protein content than US all-purpose flour. So, for best results, I’d recommend using bread flour for bread making in the UK, Australia and New Zealand.
For other countries, which classify flours differently e.g., Italy, France, Germany and others, and in countries where different wheats are used, I recommend checking the packaging to make sure your flour has a high enough protein content.
Please note. Different flours will absorb different amounts of water. So don’t be afraid to adjust the water amount to get the right dough consistency. It needs to be sticky. In the instructions for making the bread, I give some advice on how to do this.
What kind of yeast should I use?
You can use any kind of dried yeast you find in the supermarket. Look for products with names like “active dry yeast”, “instant dry yeast”, or “instant yeast”. These products come in sachets, boxes, jars and cans.
Once you’ve opened a jar, can or sachet of dry yeast, it won’t last forever. It’s best to store it in the fridge, or even the freezer. That way, it will easily last a few months.
What if my dough doesn’t rise or double in size?
There are two possibilities. First, your yeast is old and has died. Second, your dough is too cold for the yeast to grow much in the time you’re eating for the dough to rise or double in size. In that case, give the dough more time, and maybe place it in a warmer spot.
EQUIPMENT
A baking tray.
Some kind of oven proof pan or bowl big enough to cover the loaf with space to spare. It needs to be at least 8 inches (20cm) in diameter, and at least 4½ inches (12cm) tall.
INGREDIENTS
1¼ cups (300g) lukewarm water, that is somewhere between 80°F and 100°F (27°C to 37°C)
2 tsp (8g) kosher salt
2 tsp (7g) any dried yeast
3 cups (420g) all-purpose flour, plus more for dusting
INSTRUCTIONS
In a large bowl, combine the water, salt, and yeast. Give these a whisk.
Add the flour and mix using a large spoon or spatula until all the flour is incorporated. Scrape down the sides as best you can with your spoon or spatula.
The dough should be very sticky.
Depending on your flour, you might need to add more water (see the section “What kind of flour should I use for this bread?” above).
Add extra water 2 tablespoons at a time, and fully incorporate to check the change in “stickiness” of the dough.
Cover the bowl with a large plate, and leave on the counter for 30 minutes.
Stretching and folding the dough
In total, the dough will be rising for two hours. During that time we’re going to perform four rounds of "stretches and folds".
Note - We will be using two different stretching and folding techniques: one method for the first two rounds; and another method for the second two rounds.
For the first two rounds of stretches and folds
Take one side of the dough, stretch and fold bringing the dough to the opposite side of the bowl. Rotate the bowl one quarter and repeat another 3 times. (See video for details of the stretch and fold technique.)

Stretching the dough

Folding the dough
Cover the bowl and leave for 30 minutes. After 30 minutes, repeat this stretch and fold process.
Using coil folds for the final two rounds of stretches and folds

Using coil folds for the final two rounds of stretches and folds
To perform a coil fold, simply lift the dough up from the middle, and let the ends drop down under their own weight. Tuck the ends underneath the dough, so the top surface is always made from the same piece of dough.
The reason for using coil folds is to develop some tension in the top surface of the dough which will really help the loaf rise in the heat of the oven.
As with the first stretch and fold method, rotate the bowl a quarter turn and repeat, until you’ve rotated the bowl one complete turn.
Let the dough rest for 30 minutes, and repeat the coil fold process.
Note - When performing the coil folds, be gentle so that you don’t knock any air out of the dough.
At this point (after 2 hours), your dough should have doubled in size. You’ll also notice some air bubbles in the dough.
If the dough hasn’t risen much, it might be that the dough is too cold for the yeast to grow quickly. Give it up to 4 hours to see if it rises. See also the section above, “What if my dough doesn’t rise or double in size?“
Baking the bread
Pre-heat the oven and prepare your tray and “lid”

Preparing the baking tray. Brush lightly with olive oil, and dust with flour.
Pre-heat your oven to 450°F (230°C).
While the oven is pre-heating, lightly brush a baking tray with olive oil, and dust with flour so the dough won’t stick.
Note - There is no need to preheat the baking tray. When making a Dutch oven loaf, it’s important to preheat that. However, because a baking tray has such low thermal mass compared to a cast iron pot, there is no need to preheat it.
Please note - If you want to use a pizza stone instead of a baking tray (which will give a great result), you will need to pre-heat that.

Some options for “lids”. Make sure whatever you use is oven proof, and is at least 8 inches (20cm) in diameter, and at least 4½ inches (12cm) tall.
Prepare your “lid”. Whether you’re using a large springform pan, or an oven proof aluminium bowl or saucepan, you will want to brush the edges with olive oil and flour them, to make sure the dough doesn’t stick when you cover it. (Please see the Equipment section above the ingredients for minimum sizes of pans.)
Shape the dough and place it on the prepared baking tray
Using the coil fold method you used during the rising of the dough, gently shape the dough into a ball and place it on the prepared baking tray. Be gentle so that you don’t knock out any air from the dough.

Using scissors to cut a slash in the top surface of the dough
Using scissors, cut a “slash” in the top of the dough. This will allow the dough to rise taller as it bakes, and create the signature crusty “ears” that are so characteristic of artisan bread.
Notice how the slash we cut in the dough translates into the delicious crusty “ears” on the top of the finished loaf, as the dough rises in the hot oven.
Bake the bread

Covering the dough with your chosen “lid”
Cover the dough with your prepared “lid”, be it a springform pan, an oven proof bowl or saucepan. Place everything in the pre-heated oven. Bake for 20 minutes.
The second stage of baking the bread with the lid removed. Make sure to leave the loaf in long enough to allow a beautiful golden crust to develop.
After 20 minutes, remove the lid and continue baking until the loaf is a beautiful golden brown color. This indicates the crust will be delicious and crunchy.
Use your eyes to judge this - it will take different amounts of time in different ovens. Usually it takes another 15 to 20 minutes to reach the right color, but let it take as long as it needs! Don’t take it out while it’s still pale!
After removing the bread from the oven, let it cool for at least an hour, ideally on a cooling rack, before cutting into it. Allowing the bread cool will prevent the bread from ending up with a gummy interior when you cut into it.

Slicing into the finished loaf. Make sure to allow the bread to cool for at least an hour before cutting into it.
You might also like…
4-Ingredient No Knead Ciabatta
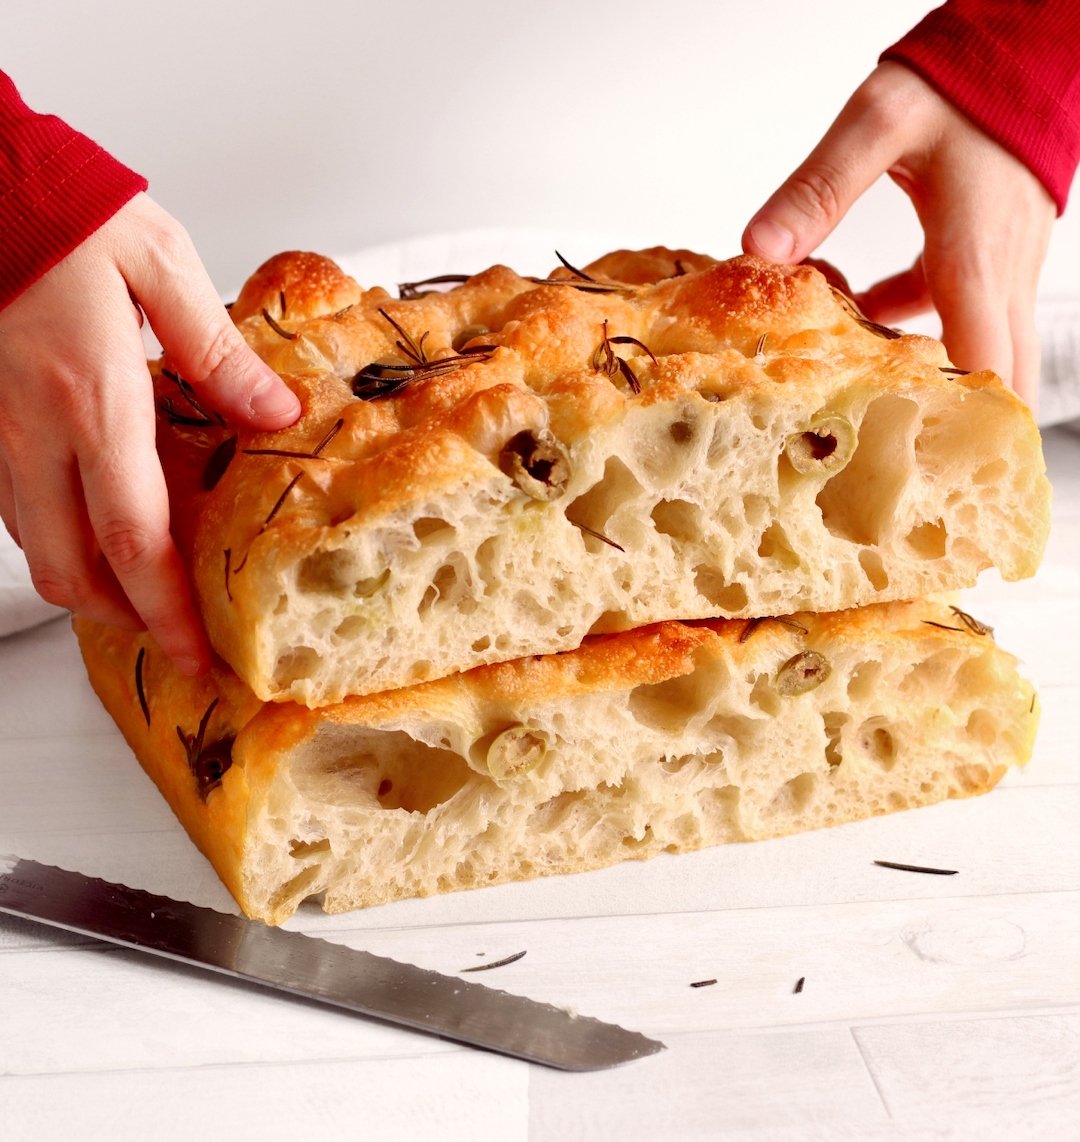
Big Bubble No-Knead Focaccia
Watch the video for more tips on the technique for making this easy rustic no-knead bread.

Categories: Easy bread recipes, 3 ingredient bread

Hi! I’m Emma Fontanella. Here you’ll find trusted, tested recipes to satisfy your baking addiction and carb cravings. Learn more…
Tried one of my recipes? Please let me know on Instagram (@emmafontanella) or TikTok (@emma.fontanella)! Hashtag #emmafontanella
Search for another recipe…