
Easy 3-Ingredient Pizza Dough (No-Knead)

Emma Fontanella’s 3-Ingredient No-Knead Pizza Dough
Easy No-Knead Pizza Dough
If you’re looking for an easy pizza dough recipe, you’ve come to the right place. This really is easiest no-knead Italian pizza dough. It only uses 3 main ingredients, and it makes the most amazing homemade pizza you'll ever have. This dough uses more water than many pizza dough recipes you’ll find online, and this is the secret to achieving a perfect airy crust.
It's quick, easy, versatile, and if you’ve ever wondered how to make amazing pizza in a home oven, leave it to the Italians to find a way. You’ll get an incredible crust that’s both soft and crunchy and you'll be amazed how delicious it is.

A homemade personal pizza, made using the easy pizza dough. This pizza was actually baked in an air fryer!
If you want even easier, even faster ways of making great pizza, my cookbook, Simple Pleasures, has recipes for an instant no-yeast pizza dough; and even a recipe for microwavable snack pizzas that cook in a minute.
I’m going to show you how to make this pizza dough in two ways. It’s the same recipe with two different methods.
The first method is perfect for beginners and for busy people. You roughly mix the dough in the morning, and then forget it—no baby-sitting required. Just go about your day, and in the evening take a few minutes to make your pizza.
The second method is for those spur-of-the-moment times when you decide you want an amazing homemade pizza for dinner, but you only have two hours to pull it together.
What is the secret to making good pizza dough?
In my opinion, the most delicious pizza is made with high hydration doughs. So, we need a flour that can both absorb water well and also forms a strong gluten network. That means, all-purpose flour isn’t ideal. Instead, we want a strong bread flour. The secret to achieving a perfect pizza crust lies in developing the gluten, which gives the dough its structure and texture. This is what lets us create the classic aerated crust at the edges of the pizza.
What ingredients do you need for pizza dough?
Pizza dough is made just using a few ingredients - flour, yeast, water and a little salt. Bread flour will give you the best results. Any kind of dried yeast is the easiest kind of yeast to use.
What is the best flour for pizza dough?
Tbe best flour for pizza dough is a strong bread flour. This gives you the best results for same day doughs, as well as doughs designed for longer fermentations like 24 hours or even 48 hours. This is because in strong bread flour, there is both more gluten and higher quality gluten when compared to all-purpose flours.
If you only have all-purpose flour, reduce the amount of water in the recipe to ¾ cup (180ml). You won’t get the same result, but you will still get a delicious pizza.
INGREDIENTS
Yields 2 small, individual pizzas
¾ cup +2 tbsp (210g) lukewarm water. That is, somewhere between 80°F and 100°F (27°C to 37°C)
1 tsp (4g) salt
1 tsp (4g )instant dried yeast
2 cups (280g) strong white bread flour
INSTRUCTIONS
I’m giving you two methods for making the dough. The first method is very hands-off and uses time to develop the dough. The second method requires just a little more hands-on technique, but the dough is ready faster this way.
This recipe will make enough dough for two small personal pizzas.
Make the pizza dough
Method 1 For Making The Pizza Dough - Using Time
Make the dough this way in the morning for use in the evening for dinner. The great thing about this first method is that it doesn’t involve any skill whatsoever! No hand-holding the dough required!
In a big bowl, combine the lukewarm water, salt, and yeast. By hydrating the yeast, we ensure it’s evenly distributed through the dough right from the start. You mix the ingredients, and leave time work its magic.
With this no knead method, time is essential. Given time, slowly but surely, the gluten network will form by itself in the high-hydration environment. So, we’re swapping out working the dough for time.
Add the flour and mix until a shaggy dough forms. Make sure there are no dry patches of flour. Push down the dough with a spatula as best you can, tightly cover the bowl and forget it. Leave it on the countertop for a minimum of 6 hours.
If you like, you could even make this the night before and put the dough in the fridge overnight. Then bring it out in the morning and leave it for the day.
After time has been working its magic for 6 to 8 hours, it’s time to give the dough some attention. It’s going to look like a complete mess. It might have risen and collapsed. Or it may look loose and wet, almost like a floury soup.
Take a spatula and run it round the sides of the bowl. Now oil your hands, and perform one round of coil folds (see Method 2 below for details of how to perform coil folds).
The first two folds might be difficult but keep going. The dough will come together and form a ball. Having done that, skip past Method 2, and go to the section “Shape The Pizza”.
Method 2 For Making The Pizza Dough - No-Knead Stretch and Fold
Use this when you need whip up some homemade pizza for dinner, without too much planning. It has the same ingredients but uses a different technique to develop gluten in a shorter amount of time.
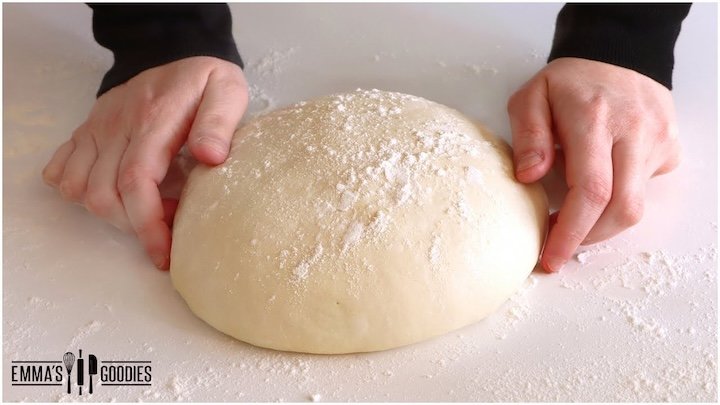
So, combine lukewarm water, salt and yeast in a big bowl . Add your high protein bread flour and using a fork or a wooden spoon mix until there are no dry patches of flour. Your dough should look soft, and sticky just like this.
Cover the dough and leave to rest for 30 minutes. After the 30 minutes is up, you’ll see the dough looks really wet. You might be thinking things have gone horribly wrong. It’s wet and sticky, and not like any pizza dough you’ve seen before!
Do not panic! Trust me, it’s going to be OK! We’re going to transform this mess into a dough ball in a matter of seconds by quickly developing a gluten network.

Lifting the dough up by its middle, to perform a coil fold (see below)
Using wet hands, pick up the dough by its middle, and give it a shake to stretch it a little. Then fold the ends under to try make a ball These kind of folds are called “coil folds”. .
Don’t worry if it’s a mess - to start with, we don’t have much gluten developed. Keep the faith! Rotate the bowl 90 degrees and do that again. Repeat two more times.
Cover and set aside for 30 minutes. After 30 minutes, perform another 4 coil folds.
The reason we’re doing it this way compared to the traditional stretch and folds that you might have used before in my bread recipes is that we want to always keep the same top surface of the dough throughout the whole process.
This really helps us later on when we’re stretching out the pizza base as the dough has a rounded shape to begin with and the top surface will have dried out a little to make the dough easy to handle. Inside, it will still be very wet and sticky!
Cover again and come back in 30 minutes and do a last round of coil folds, rotating the bowl every time. You want to do 4 folds in total as we did before.
So once you’ve done your last coil fold, you’re going to lightly oil your countertop and transfer the dough right onto that oil.
Preheat your oven
This is the time to turn your oven up to a high heat 450°F (230°C) and put a pizza stone in if you have one. If you don’t have a pizza stone, use a baking tray instead.
Shape the pizza
Oil the top of the dough ball and cut it in half. The oil prevents the dough from sticking to your work surface and bench scraper. You want to ball up the two pieces of dough as best you can, creating pressure with the palm of your hand.
Flour a baking tray really generously. Don’t skimp on the flour. Put the dough balls onto the floured baking tray. Cover with another tray, or with plastic wrap. Leave for 30 minutes.

Shaping the pizza base. Notice how we push the air in the dough to the outside edge, to form the aerated crust.
Now, we’re going to shape the dough to make a pizza base.
Put a small pile of flour on my countertop and drop the dough ball into it. Flip the dough over, to completely coat it in flour.
Begin to gently stretch out the dough with your hands. The key here is that we want to keep all the air bubbles in the dough and push them to the outer edge to form the crust.
If the dough is pulling back after you stretch it. Leave it for 5 minutes, then come back to it and stretch it some more.
Once the base is roughly formed, sweep your pile of flour away, and work the dough to form a circle.
Sprinkle some semolina onto a piece of parchment paper, and transfer the base to it.
Do the same with the other dough ball.
Top the pizzas and bake them
Now, spread a little pizza sauce onto the base. All you need for the sauce is some crushed tomatoes and a little salt.
Add whatever toppings you prefer. My advice is to keep it simple. I like to grate a little Parmesan over the sauce, and then add some pieces of low-moisture mozzarella.
Transfer the pizzas on their parchment paper to your preheated baking stone or baking tray.
Bake until they look done - the crust will be browned, and the cheese melted. Around 10 minutes.

The finished pizza. A few basil leaves are scattered on top after it’s finished baking.
Watch the video for more tips

Hi! I’m Emma Fontanella. Here you’ll find trusted, tested recipes to satisfy your baking addiction and carb cravings. Learn more…
Tried one of my recipes? Please let me know on Instagram (@emmafontanella) or TikTok (@emma.fontanella)! Hashtag #emmafontanella
Search for another recipe…